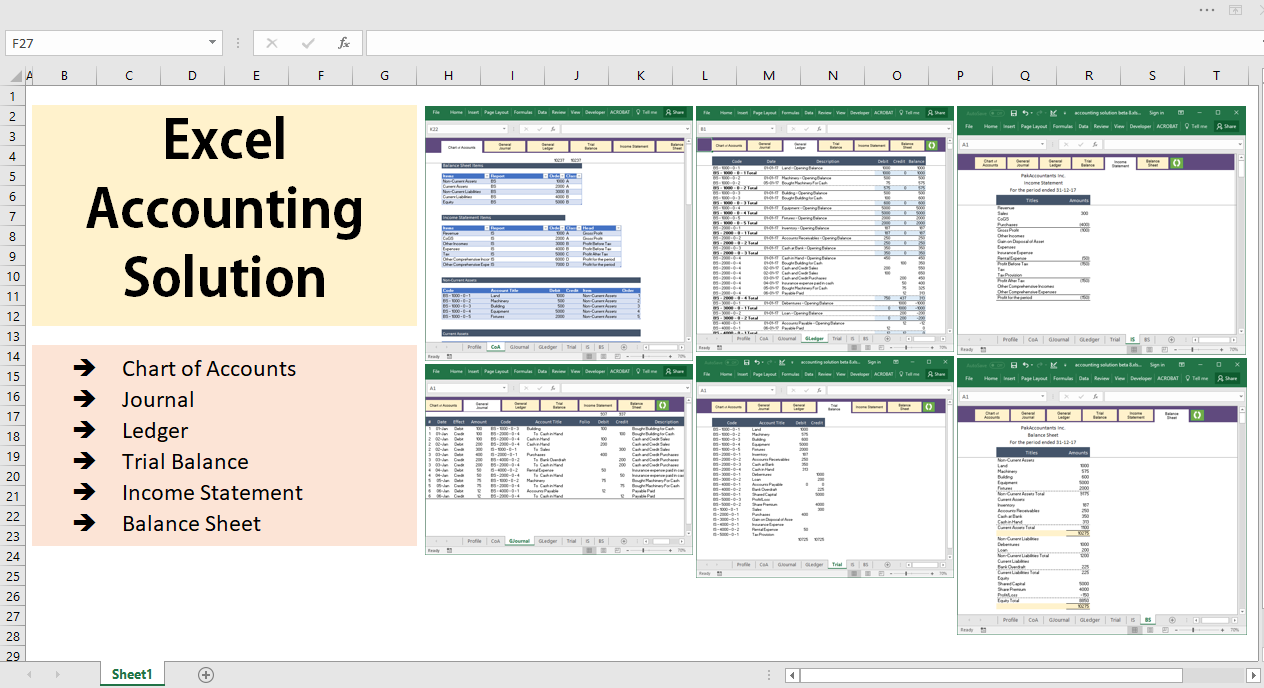
Are you looking for a simple way to manage your finances without spending a fortune on expensive software? Creating your own accounting software in Excel might be the perfect solution.
Imagine having a tool tailored exactly to your needs, where you control every detail and track your money with ease. In this guide, you’ll discover step-by-step how to build an easy-to-use accounting system right inside Excel. By the end, you’ll have a powerful tool that saves you time and helps you make smarter financial decisions.
Ready to take control of your accounts? Let’s dive in.

Credit: www.youtube.com
Planning Your Accounting Software
Planning is the first step to create accounting software in Excel. A clear plan helps you build a useful and easy-to-use tool. It saves time and avoids mistakes. Planning involves knowing what you need, how data flows, and how it looks.
Identifying Key Features
Decide what your software must do. Track income, expenses, and invoices. Calculate taxes and profits. Include a summary page for quick review. Make sure features match your business needs. Keep features simple to avoid confusion.
Setting Up Your Workflow
Plan how data moves through your software. Start with entering transactions. Then categorize each entry. Next, check calculations for accuracy. Finally, generate reports for review. A clear flow helps keep data organized and easy to follow.
Designing The Layout
Choose a clean, simple layout. Use separate sheets for data entry and reports. Label columns and rows clearly. Use colors to highlight important areas. Keep fonts readable and consistent. A neat layout helps users work faster and avoid errors.
Setting Up Excel Workbook
Setting up your Excel workbook is the first step to creating simple accounting software. This process helps keep your data clear and easy to manage. A well-organized workbook saves time and prevents errors in your accounting tasks.
Start by planning the structure of your workbook. Think about the types of data you will track. This includes sales, expenses, invoices, and reports. Each type needs its own space in the workbook.
Creating Necessary Worksheets
Create separate worksheets for each accounting category. For example, use one sheet for sales records and another for expenses. This separation helps you find information quickly.
Include sheets like “Invoices,” “Payments,” and “Summary.” Each sheet should focus on a specific area of your accounts. This makes your workbook neat and easy to navigate.
Naming And Organizing Sheets
Name each worksheet clearly and simply. Use names like “Sales 2024” or “Expense Log.” Clear names reduce confusion and speed up your work.
Arrange sheets in a logical order. Put summary sheets at the front and detailed data sheets after. This order helps you review key information fast.
Configuring Workbook Settings
Adjust settings to protect your data. Use password protection to secure your workbook. This stops unauthorized changes.
Set your calculation options to automatic. This keeps your numbers updated without manual work. Also, check that your date and number formats match your local system.
Building The Data Input Forms
Building data input forms is a key step in creating accounting software in Excel. Forms help users enter information clearly and quickly. Well-designed forms reduce errors and save time. They also organize data in a way that Excel can easily process.
This section explains how to build effective data input forms. It covers using tables, applying data validation, and creating drop-down menus. These tools improve data entry and keep your accounting software reliable.
Using Tables For Data Entry
Tables in Excel make data entry neat and structured. They automatically expand as you add new rows. This keeps your data organized and easy to read. Tables also help with sorting and filtering data. Using tables means less manual work and fewer mistakes.
Applying Data Validation
Data validation controls what users can enter in a cell. It prevents wrong or invalid data inputs. You can set rules like number ranges or text length limits. Validation helps keep your accounting data accurate. It stops errors before they happen.
Creating Drop-down Menus
Drop-down menus let users pick from a list of options. This speeds up data entry and reduces typing errors. You can create drop-downs using Excel’s data validation feature. Lists can include categories like expense types or payment methods. Drop-downs make your forms easy and user-friendly.
Implementing Formulas And Functions
Implementing formulas and functions in Excel is key to building your own accounting software. These tools help calculate data automatically. They save time and reduce errors. With formulas, your spreadsheet becomes dynamic and smart.
Formulas perform calculations on numbers and data in your sheets. Functions are pre-made formulas that handle common tasks. Using both lets you create totals, check conditions, and update records fast. Here are some important steps to add formulas and functions effectively.
Calculating Totals And Balances
Start by adding totals for income, expenses, and other key data. Use the SUM function to add numbers in a range. For example, =SUM(B2:B10) adds values from cells B2 to B10.
Calculating balances is also important. Subtract expenses from income using a simple formula. For instance, =C2-D2 subtracts cell D2 from C2. This shows your current balance.
Use these basic formulas to track money flow automatically. It keeps your accounting accurate and up-to-date.
Using If And Sumif Functions
The IF function helps check conditions and return results based on them. For example, =IF(E2>1000, "High", "Low") shows “High” if E2 is more than 1000, else “Low”.
SUMIF adds values that meet a condition. For example, =SUMIF(A2:A20, "Rent", B2:B20) adds amounts in B2:B20 if A2:A20 equals “Rent”.
These functions create smart reports and summaries. They filter and calculate data automatically.
Automating Date And Time Stamps
Adding date and time stamps helps track when transactions happen. Use the =TODAY() function to get the current date. This updates automatically every day.
For a fixed date stamp, press Ctrl + ; to insert the current date manually. For time, use =NOW() to show the current date and time.
These timestamps make your records organized and easy to follow. You can monitor transaction dates without extra work.
Designing Financial Reports
Designing financial reports is a key step in creating accounting software in Excel. These reports show the health of a business clearly. They help users understand income, expenses, assets, and cash flow. Well-designed reports make data easy to read and analyze.
Excel offers tools like formulas, tables, and charts to build these reports. Organizing data with clear headers and consistent formats improves readability. Let’s explore how to create three important financial reports in Excel.
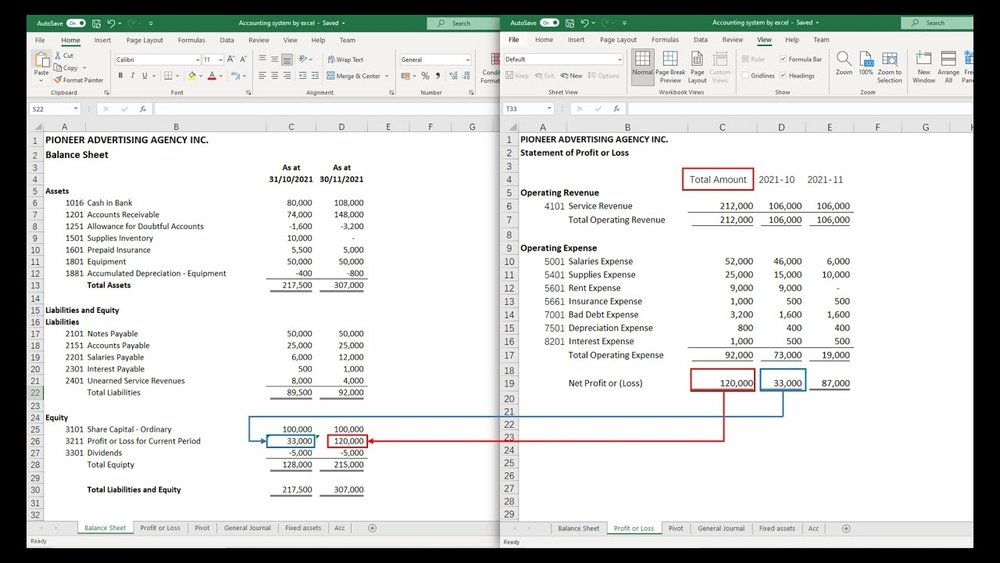
Creating Income Statements
Income statements show profits and losses over time. Start by listing all revenues at the top. Below, add all expenses like salaries, rent, and utilities. Subtract expenses from revenues to find net profit or loss.
Use Excel formulas to sum revenues and expenses automatically. Format numbers with currency symbols for clarity. Adding a simple table layout helps users follow the data easily.
Building Balance Sheets
Balance sheets display what a company owns and owes. Separate assets, liabilities, and equity into different sections. List assets like cash, inventory, and equipment first. Then, add liabilities such as loans and accounts payable.
Calculate equity by subtracting liabilities from assets. Use cell references to link values and keep totals updated. Clear labels and consistent formatting make the balance sheet professional and simple.
Generating Cash Flow Reports
Cash flow reports track money moving in and out of the business. Organize cash inflows from sales or loans. List cash outflows like expenses and investments below. Calculate net cash flow to show cash increase or decrease.
Excel’s sum and subtraction formulas help automate these calculations. Use color coding to highlight positive and negative cash flows. This visual aid improves quick understanding of cash health.
Credit: pakaccountants.com
Adding Data Visualization
Adding data visualization makes your accounting software easier to understand. Visual tools help you see trends and spot problems fast. Charts, colors, and highlights turn raw numbers into clear stories.
Visuals also help to compare data over time or across categories. They make reports more attractive and less boring. This section explains how to add charts, use colors, and highlight key numbers in Excel.
Inserting Charts And Graphs
Select your data range first. Then go to the Insert tab. Choose a chart type like bar, line, or pie. Excel creates the chart automatically. You can move and resize it as needed.
Charts show your financial data visually. Trends become clear. Comparing income and expenses is easier. Change chart styles to fit your report style. Use simple charts to avoid confusion.
Using Conditional Formatting
Conditional formatting adds color based on your data. Select the cells to format. Click Home, then Conditional Formatting. Choose rules like “greater than” or “top 10%”. Pick colors to highlight important numbers.
This helps spot high costs or low profits quickly. Colors guide your eyes to the most important data. Change rules anytime to fit your needs. Use simple color schemes for clarity.
Highlighting Key Metrics
Key metrics show the health of your finances. Create separate cells for totals, averages, or ratios. Use bold fonts or background colors to make them stand out.
Highlight metrics like total revenue, expenses, or profit margin. This makes review faster and easier. Use formulas to update metrics automatically. Keep key numbers visible on every sheet.
Automating Tasks With Macros
Automating tasks with macros saves time and reduces errors in Excel accounting software. Macros perform repeated actions with a single click. This makes managing financial data easier and faster. Beginners can use simple macros to handle common tasks. Advanced users can create complex scripts for detailed automation.
Recording Simple Macros
Start by recording a macro to capture your actions. Go to the Developer tab and click “Record Macro.” Perform the task you want to automate, such as formatting cells or entering formulas. Stop recording when finished. Excel saves these steps to replay later. This helps automate routine actions without writing code.
Assigning Macros To Buttons
Make macros easy to use by adding buttons. Insert a button from the Developer tab. Assign your recorded macro to this button. Click the button to run the macro instantly. This provides quick access to automation. Users do not need to open the macro menu or remember shortcuts.
Managing Macro Security Settings
Macros can contain harmful code. Adjust security settings to keep Excel safe. Go to File > Options > Trust Center > Trust Center Settings. Choose your preferred security level. Enable macros only from trusted sources. This prevents unwanted or dangerous macros from running automatically.
Testing And Troubleshooting
Testing and troubleshooting are vital steps in creating accounting software in Excel. These steps ensure your software works correctly and handles data well. Skipping them can lead to errors and incorrect reports.
Careful testing helps find mistakes early. Troubleshooting fixes problems to keep your software reliable. This part focuses on checking data accuracy, fixing errors, and improving speed.
Validating Data Accuracy
Check your formulas and calculations carefully. Make sure totals and balances match expected results. Use sample data to compare outputs with manual calculations. Validation helps catch mistakes before real use. Double-check input cells for correct data types and formats.
Debugging Common Errors
Look for formula errors like VALUE!, REF!, or DIV/0!. Break complex formulas into smaller parts to isolate issues. Use Excel’s auditing tools like Trace Precedents and Error Checking. Check for missing or extra spaces in text fields. Fix broken links in references or external data sources.
Optimizing Performance
Remove unnecessary calculations or duplicate formulas. Use Excel tables and structured references for efficiency. Limit volatile functions like NOW() or INDIRECT() that slow down updates. Keep your file size small by deleting unused sheets and formatting. Test your workbook speed with larger data sets to ensure smooth operation.
Securing Your Workbook
Securing your Excel workbook is important for keeping your accounting data safe. Protecting your work prevents mistakes and unauthorized changes. Follow these steps to secure your workbook effectively.
Protecting Sheets And Cells
Lock important sheets and cells to stop unwanted edits. Select cells you want users to change. Then, lock the rest of the sheet. This helps keep formulas and data intact. Use Excel’s “Protect Sheet” feature for easy protection.
Setting Passwords
Add passwords to your workbook for extra security. Passwords stop others from opening or changing your file. Choose a strong password with letters and numbers. Save it safely to avoid losing access. Password protection adds a strong layer of defense.
Backing Up Your Data
Always back up your Excel files regularly. Save copies on external drives or cloud storage. Backups protect your data from accidental loss or corruption. Set reminders to back up after major updates. This simple step keeps your accounting work safe.

Credit: quickbooks.intuit.com
Frequently Asked Questions
What Are The Basics Of Accounting Software In Excel?
Accounting software in Excel tracks income, expenses, and financial data. It uses formulas, tables, and charts to organize information efficiently. This method is cost-effective and customizable for small businesses or freelancers.
How To Set Up A Simple Accounting Template In Excel?
Start by creating columns for date, description, category, income, and expense. Use Excel formulas to calculate totals and balances automatically. Format cells for clarity and add drop-down lists for categories.
Can Excel Handle Complex Accounting Tasks?
Excel can manage complex accounting with advanced formulas, pivot tables, and macros. However, it requires skill and manual updates, making dedicated software better for large businesses.
How Do I Automate Calculations In Excel Accounting Software?
Use built-in functions like SUM, IF, and VLOOKUP to automate calculations. Macros can automate repetitive tasks. Automation reduces errors and saves time in financial data management.
Conclusion
Creating accounting software in Excel is simple and useful. You can track income, expenses, and budgets easily. Customize sheets to fit your business needs perfectly. Regular updates keep your data accurate and clear. Practice with formulas to improve your skills quickly.
Excel offers a flexible way to manage finances without extra cost. Start small and build your software step by step. Enjoy better control over your accounts with this method. Excel makes accounting accessible for everyone.