Are you tired of juggling complicated invoicing tools or spending extra money on software you barely use? What if you could create a simple, effective invoice system right inside Excel—one that fits your needs perfectly and saves you time?
You’ll discover step-by-step how to build your own invoice software in Excel, even if you’re not a tech expert. By the end, you’ll have a powerful tool that helps you get paid faster and stay organized effortlessly. Ready to take control of your invoicing?
Let’s dive in.
Setting Up The Workbook
Setting up your Excel workbook is the first step to creating effective invoice software. A clean and organized workbook helps you manage invoices easily. Proper setup saves time and reduces mistakes.
Creating A New Excel File
Open Excel and start a new blank workbook. This gives you a fresh space to build your invoice system. Save the file right away with a clear name. This helps you find it fast later.
Naming Your Worksheet
Rename the default sheet to something like “Invoice” or “Billing.” This keeps your workbook organized and easy to navigate. Clear names make it simple to add more sheets for reports or clients.
Adjusting Column Widths
Set column widths to fit your invoice details. For example, make columns wider for item descriptions. Narrow columns work for numbers or dates. Proper widths keep your invoice neat and readable.

Credit: www.youtube.com
Designing The Invoice Layout
Designing the invoice layout in Excel sets the foundation for a clear and professional document. A well-organized layout helps both you and your customers understand the invoice quickly. It makes tracking payments and managing records easier. Focus on simplicity and clarity to create a useful invoice template.
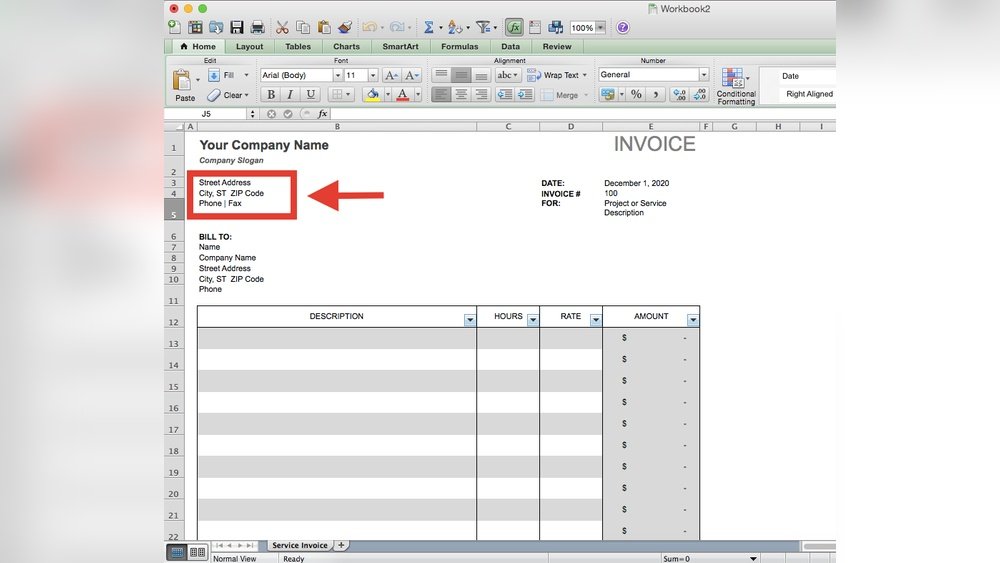
Adding Company Details
Start by placing your company name at the top. Use a bold font to make it stand out. Below the name, include your address, phone number, and email. This information helps your customers contact you easily. You can also add your company logo to personalize the invoice. Keep this section neat and aligned to the left or center.
Inserting Customer Information
Next, create a space for the customer’s details. Include fields for their name, address, and contact number. Place this information below or beside your company details. This section shows who the invoice is for. Make sure the layout separates customer info clearly from your company info.
Setting Invoice Number And Date
Assign a unique invoice number for each new invoice. This helps you track payments and avoid duplicates. Place the invoice number at the top right corner for easy reference. Add the invoice date near the number. Use the date format that your customers will understand. This small detail keeps your records organized and professional.
Building The Itemized Table
Building the itemized table is a key step in creating invoice software in Excel. This table lists all products or services your customer buys. It helps organize details clearly and makes calculating totals easy. Well-structured tables improve readability and reduce errors.
Listing Product Or Service Names
Start by creating a column for product or service names. Enter each item your customer buys in separate rows. Use simple names everyone understands. This helps you and your customers know exactly what is billed. Keep the list neat and easy to read.
Adding Quantity And Price Columns
Next, add columns for quantity and price. Quantity shows how many units your customer orders. Price is the cost per unit. Both columns should be side by side for easy reference. Use number format for quantity and currency format for price. This setup helps in quick data entry and clear presentation.
Calculating Line Totals
To find the total cost for each item, multiply quantity by price. Create a new column called Line Total. Use an Excel formula like =B2C2 where B2 is quantity and C2 is price. Drag the formula down to apply it to all rows. This step ensures correct total for each product or service.
Credit: www.youtube.com
Implementing Formulas
Implementing formulas in your Excel invoice makes calculations fast and accurate. Formulas reduce errors and save time. You can set up automatic calculations for totals, taxes, and final amounts.
This section explains how to use basic formulas step-by-step. Start with simple sums, then add tax calculations, and finish with the grand total. Follow these easy steps to make your invoice work automatically.
Using Sum For Total Amount
The SUM formula adds numbers in a range of cells. Use it to calculate the total price of all items.
For example, if your item prices are in cells B2 to B10, type =SUM(B2:B10) in the total cell. This formula adds all values in those cells. It updates the total when you change any item price.
Applying Tax Calculations
Calculate tax by multiplying the total amount by the tax rate. If your tax rate is 10%, write it as 0.10 in a cell, for example, C1.
In the tax cell, use =TotalCellC1. Replace TotalCell with the cell holding the total amount. This formula calculates the tax based on the total.
Calculating Grand Total
The grand total is the sum of the total amount and tax. Use the SUM formula again to add these two values.
If total amount is in B11 and tax in B12, write =SUM(B11,B12) in the grand total cell. This gives the final invoice amount automatically.
Formatting For Clarity
Formatting is key for making your invoice clear and easy to read. Good formatting helps your client find details fast. It also makes your invoice look professional. Simple changes can improve how your invoice appears. Focus on clear lines, proper number formats, and important highlights. These help avoid confusion and speed up payments.
Applying Borders And Shading
Use borders to separate different sections of your invoice. Thin lines can outline your header, item list, and total amount areas. Shading helps mark important rows or columns. Light gray shading works well without distracting. Borders and shading keep your invoice neat. They guide the eye across the page smoothly.
Using Currency Formats
Format all prices using the correct currency style. Excel has built-in currency formats for dollars, euros, and more. This shows amounts clearly as money, not just numbers. Currency formatting aligns decimal points for easy comparison. Avoid typing currency symbols manually. Proper formatting makes totals accurate and easy to read.
Highlighting Important Fields
Highlight key fields like invoice number, date, and total due. Use bold text or a different background color. Keep the highlight subtle but noticeable. This draws attention to critical details. Clients quickly find what matters most. Highlighting reduces questions and speeds up invoice processing.

Credit: www.spreadsheet123.com
Adding Drop-down Lists
Adding drop-down lists to your Excel invoice software makes it easier to select products. It reduces typing errors and saves time. Drop-downs help keep your invoice clean and organized. You can quickly choose items from a list instead of typing each one.
Creating Product Lists
Start by making a list of all products in one Excel column. Use a new sheet or a clear area on the current sheet. Each product should have its own cell. This list will be the source for your drop-down menu. Keep the list simple and update it as needed.
Using Data Validation
Select the cells where you want the drop-down menu to appear. Go to the Data tab and click on Data Validation. Choose “List” from the options. In the source box, select the range of your product list. Click OK to create the drop-down list in those cells.
Simplifying Item Selection
Drop-down lists let you pick items quickly and avoid mistakes. They make entering invoice data faster and more accurate. You can also use named ranges for your product list. This helps keep your drop-down menus organized and easy to update. Simplify your invoice process with these lists.
Protecting The Invoice Template
Protecting your invoice template in Excel keeps your work safe and accurate. It stops changes to important parts like formulas. This helps avoid errors in calculations. Also, it makes the invoice look consistent each time you use it.
Protection lets you control which cells users can edit. You can lock cells with formulas and allow data entry only in specific areas. This way, users fill only the needed information without breaking the template.
Locking Formula Cells
Select the cells with formulas first. Right-click and choose Format Cells. Go to the Protection tab and check “Locked.” This step prevents those cells from being changed. Next, protect the worksheet from the Review tab. Click “Protect Sheet” and set a password if needed. Now, formula cells stay safe.
Allowing Data Entry Areas
Unlock the cells where users enter data. Select these cells and open Format Cells again. Uncheck “Locked” under Protection. This allows users to type in these areas only. It keeps the rest of the sheet secure from edits. Clear instructions help users know where to input data.
Saving As A Template
Save your work as an Excel template file (.xltx). Click File, then Save As, and choose “Excel Template.” This keeps your protection settings and layout intact. Users can open the template for new invoices without changing the original. Templates save time and keep your invoice consistent.
Testing And Saving Invoices
Testing and saving invoices is an important step in making invoice software in Excel. It helps ensure that your invoice works correctly and that no errors appear. Testing also helps you confirm that all calculations are accurate. Saving invoices properly keeps your records organized and easy to access later.
Entering Sample Data
Start by entering sample data into your invoice template. Use fake customer names, item descriptions, and prices. This step shows if your template accepts information as expected. It also helps you see the layout and design with real-like data. Enter different types of data to test all sections of the invoice.
Checking Calculations
Look at all totals and formulas after entering sample data. Check sums, taxes, and discounts carefully. Make sure Excel calculates them correctly. Test by changing quantities or prices to see if totals update. Fix any errors in formulas to avoid wrong billing later.
Saving Individual Invoices
Save each tested invoice as a separate file. Use clear names like customer name and date for easy searching. Save invoices in a dedicated folder to keep them organized. This method helps you find and send invoices quickly. Back up your files regularly to protect your data.
Frequently Asked Questions
How Do I Start Creating Invoice Software In Excel?
Begin by setting up a clear template with fields for client info, items, prices, and totals. Use Excel formulas to automate calculations like totals and taxes. Organize your layout for easy data entry and readability.
What Excel Features Help Automate Invoice Creation?
Excel features like formulas, drop-down lists, and conditional formatting streamline invoice creation. Use SUM, IF, and VLOOKUP formulas to calculate totals and fetch data. These tools reduce manual errors and save time when generating invoices.
Can I Customize Invoice Templates In Excel?
Yes, Excel allows full customization of invoice templates. You can modify fonts, colors, and layout to match your brand. Adding your logo and adjusting fields makes your invoices professional and tailored to your business needs.
How Do I Add Tax Calculations In Excel Invoices?
Use formulas like =Price*TaxRate to calculate taxes automatically. Set tax rates in a separate cell for easy updates. This approach ensures accurate tax amounts on each invoice without manual calculations.
Conclusion
Creating invoice software in Excel saves time and effort. It helps organize billing clearly and simply. You control the design and details yourself. No need for expensive programs or special skills. Just follow the steps carefully and test your work.
This skill grows with practice and use. Start now to manage your invoices better today. Easy, fast, and effective.