Migrating a website to a new host can seem daunting. But with the right steps, it’s manageable.
Moving your website to a new host might feel overwhelming at first. But it’s a common task many website owners face. Whether it’s for better performance, improved support, or lower costs, switching hosts can bring many benefits. This guide will help you through the process.
We’ll cover each step clearly and simply, so you can feel confident in making the move. Let’s get started and make your website migration smooth and successful.
Choosing A New Host
Choosing a new web host is a vital step in migrating your website. The new host will affect your site’s speed, security, and reliability. Make an informed decision to ensure your website performs well.
Factors To Consider
There are several factors you need to consider when selecting a new host:
- Uptime Guarantee: Look for a host with at least 99.9% uptime.
- Customer Support: Choose a host with 24/7 support.
- Scalability: Ensure the host can grow with your website.
- Security Features: Check for SSL certificates, backups, and DDoS protection.
- Pricing: Compare the cost of plans and additional features.
Top Hosting Providers
Here are some of the top hosting providers to consider:
| Provider | Key Features | Starting Price |
|---|---|---|
| Bluehost | Free domain, SSL, 24/7 support | $2.95/month |
| SiteGround | Daily backups, free CDN, 24/7 support | $3.99/month |
| HostGator | Free website migration, SSL, 24/7 support | $2.75/month |
| InMotion | Free domain, SSD storage, 24/7 support | $2.49/month |
| A2 Hosting | Free site migration, SSD, anytime money-back | $2.99/month |

Credit: www.youtube.com
Backing Up Your Website
Before migrating your website, creating a reliable backup is crucial. This ensures that you have a copy of your site in case something goes wrong. Backing up your site can be done manually or with automated tools. Below, we’ll explore both methods.
Manual Backup Methods
Manual backups involve copying your website files and database yourself. This method is straightforward but requires attention to detail.
- Download Files via FTP: Use an FTP client like FileZilla. Connect to your web server and download all website files to your computer.
- Export Database: Access your hosting control panel (cPanel). Use phpMyAdmin to export your site’s database as an SQL file.
- Store Safely: Save these files in a secure location. Consider using cloud storage for extra protection.
Automated Backup Tools
Automated backup tools simplify the backup process. These tools can save time and reduce errors.
- WordPress Plugins: Plugins like UpdraftPlus, BackupBuddy, and Duplicator can create and store backups automatically. They offer easy restoration options.
- Hosting Services: Some hosting providers offer built-in backup solutions. Check with your host to see if they offer automated backups.
- Third-Party Services: Services like CodeGuard and VaultPress provide automated backups. They often include features like incremental backups and one-click restores.
Using automated tools ensures regular backups without manual intervention. This adds an extra layer of security to your website migration process.
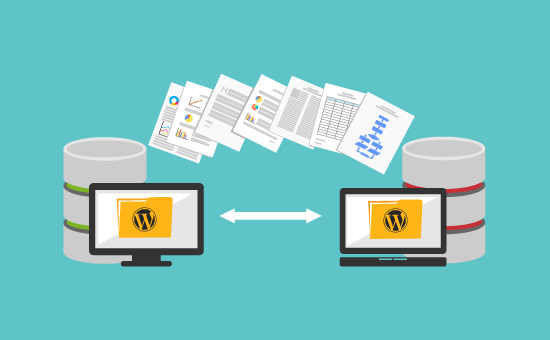
Downloading Website Files
Downloading your website files is a crucial step in migrating to a new host. This ensures you have a complete backup of your site. There are two main methods to download your files. You can use FTP clients or file managers. Both methods are effective and simple.
Using Ftp Clients
FTP clients are popular tools for downloading website files. They connect your computer to your web server. This allows you to transfer files easily. First, download and install an FTP client like FileZilla. Open the FTP client and enter your website’s FTP credentials. You will need your host address, username, and password. Once connected, navigate to your website’s root directory. Select all files and folders, then drag them to a folder on your computer. This will start the download process. It may take some time, depending on your site’s size.
Using File Managers
Many hosting providers offer built-in file managers. These tools are accessible through your hosting control panel. To use a file manager, log in to your hosting account. Locate and open the file manager tool. Navigate to your website’s root directory. Select all files and folders. Next, choose the download option. The file manager will compress the files into a single archive. Once the download is complete, save the archive to your computer. This method is often faster and simpler than using FTP clients.
Credit: www.cloudways.com
Exporting Databases
Migrating a website often requires exporting your databases. This step is crucial as it ensures all your data is moved correctly. Two common methods for exporting databases are by using phpMyAdmin or the command line.
Using Phpmyadmin
phpMyAdmin is a popular tool for database management. It is user-friendly and available in most hosting services.
- Log in to your hosting account.
- Access phpMyAdmin from the control panel.
- Choose the database you want to export.
- Click on the Export tab at the top.
- Select the Quick export method for simplicity.
- Choose the SQL format and click Go.
Your database will be downloaded as a .sql file. Keep this file safe for the import process.
Using Command Line
The command line method is ideal for those comfortable with terminal commands. It is a faster method for large databases.
- Open your terminal or command prompt.
- Use the following command to export the database:
mysqldump -u username -p database_name > database_name.sqlReplace username with your database username and database_name with the name of your database.
- Enter your database password when prompted.
This command will create a .sql file in your current directory. Ensure you transfer this file to your new host.
By following these methods, you can securely export your databases. This ensures a smooth transition to your new host.
Setting Up The New Host
Setting up the new host is a critical step in migrating a website. This process ensures your website runs smoothly on the new server. Let’s break it down into simple steps.
Creating A New Database
A database stores all your website’s important data. To start, log into your new hosting account. Find the database section, usually named “MySQL Databases” or similar. Create a new database by clicking on “Create Database.” Name it something you’ll remember. Note down the database name, username, and password. You will need these details later.
Uploading Files To The New Server
Next, you need to upload your website files to the new server. Use an FTP client like FileZilla for this task. Connect to your new server by entering the FTP details provided by your new host. Once connected, find the “public_html” folder. This is where your website files go. Upload all files from your old host to this folder. This process might take some time, depending on the size of your website.
After uploading, check that all files are in the right place. This step is crucial to ensure your website functions correctly.
Updating Dns Settings
Updating your DNS settings is an essential step in migrating a website to a new host. This process involves changing the nameservers and waiting for DNS propagation. Correctly updating your DNS settings ensures that visitors reach your website without interruption. Let’s break down the steps in detail.
Changing Nameservers
To change your nameservers, follow these steps:
- Log in to your domain registrar account.
- Navigate to the DNS settings or domain management section.
- Locate the option to change nameservers.
- Replace the current nameservers with the ones provided by your new host. They typically look like
ns1.newhost.comandns2.newhost.com. - Save the changes.
After updating, the new nameservers will direct traffic to your new hosting provider.
Propagation Time
After changing nameservers, there is a propagation period. This can take between 24 to 48 hours. During this time, DNS servers worldwide update their records to reflect the new nameservers.
To monitor this process, you can use tools such as DNS Checker or WhatsMyDNS.
Be patient. Your site may experience temporary downtimes or inconsistencies during propagation. It’s normal and will resolve soon.
Here’s a brief table summarizing the steps and their purposes:
| Step | Purpose |
|---|---|
| Log in to domain registrar | Access DNS settings |
| Navigate to DNS settings | Find domain management options |
| Change nameservers | Update to new host’s nameservers |
| Save changes | Apply new settings |
With these steps, your website migration will be smooth and efficient.
Testing The New Setup
Once your website is moved to a new host, it’s time to test the new setup. This step ensures your site functions smoothly. Thorough testing helps identify and fix issues before your site goes live.
Checking For Broken Links
Broken links harm user experience and SEO. Use tools like Google Search Console or Broken Link Checker to find them. Carefully review each page and ensure all internal and external links work.
Here’s a quick checklist:
- Check all menu links.
- Test links in your footer.
- Verify links in your content.
Ensuring Database Connectivity
Your website’s database must be connected correctly. Improper connections lead to errors and data loss. Follow these steps:
- Access your database via phpMyAdmin.
- Check connection settings in your
wp-config.phpfile. - Test database queries to ensure data retrieval works.
Ensure all user data, posts, and pages display correctly.
Final Steps
You’ve almost completed the journey of migrating your website to a new host. The final steps ensure everything runs smoothly on the new server. This involves monitoring site performance and troubleshooting common issues. Let’s dive into these critical tasks to wrap up your website migration process.
Monitoring Site Performance
After moving your website, it’s crucial to monitor its performance. This helps you identify any potential issues early. Use tools like Google Analytics or Pingdom to track your site’s speed and uptime. Here are some key metrics to watch:
- Page Load Time: Ensure pages load quickly.
- Uptime: Your site should be online and accessible.
- Server Response Time: The time your server takes to respond to requests.
Regularly check these metrics for the first few weeks. This ensures your site is running optimally on the new host.
Troubleshooting Common Issues
Even with careful planning, issues may arise post-migration. Here are some common problems and their solutions:
| Issue | Solution |
|---|---|
| Broken Links | Use a tool to find and fix broken links. |
| Missing Images | Check the paths of your images and re-upload if needed. |
| Database Errors | Ensure your database is correctly configured and connected. |
If you encounter issues, refer to your host’s support documentation. Many hosts offer 24/7 support to help resolve problems quickly.
By following these final steps, you can ensure a smooth transition to your new host. Your website will perform well and offer a great experience for your visitors.

Credit: www.youtube.com
Frequently Asked Questions
What Is Website Migration?
Website migration is the process of moving a website from one hosting provider to another. It involves transferring files, databases, and configurations.
How To Prepare For Website Migration?
Before migrating, backup your website’s files and database. Ensure the new host meets all your website’s requirements.
How Long Does Website Migration Take?
Website migration typically takes a few hours. However, it can vary based on website size and complexity.
Will Website Migration Affect Seo?
Proper migration should not affect SEO. Ensure to set up 301 redirects and update your sitemap.
Conclusion
Migrating a website to a new host can seem daunting. Follow the steps outlined to ensure a smooth transition. Backup your data, update DNS settings, and test the site thoroughly. With careful planning, your website will be up and running on the new host without issues.
Regular checks and maintenance help keep your site performing well. Happy migrating!